written originally in 2020 for Revit 2019; information/menus/graphics/etc may be outdated or no longer work.
Overview
Revit has a find and replace feature (under Annotate), however, this cannot access certain data within the file such as room names, sheets, and views. We will set up a very simple Dynamo definition in order to change words.
This is useful for accidental misspellings, fixing terminology, or if your client suddenly wants all “bathrooms” to be called “restrooms” (which is what this example will cover).
- Ex: Bathroom to Restroom
- Ex: Restrom to Restroom
- Ex: Bdrm to Bedroom
- Ex: Room to Unnamed Room
Packages Required
None, this will use only standard Revit/Dynamo packages
Prep Steps:
- Generally, its better to set Dynamo to only run when told, switch this bottom left from Automatic to Manual
- Save a new Definition wherever you want
Steps:
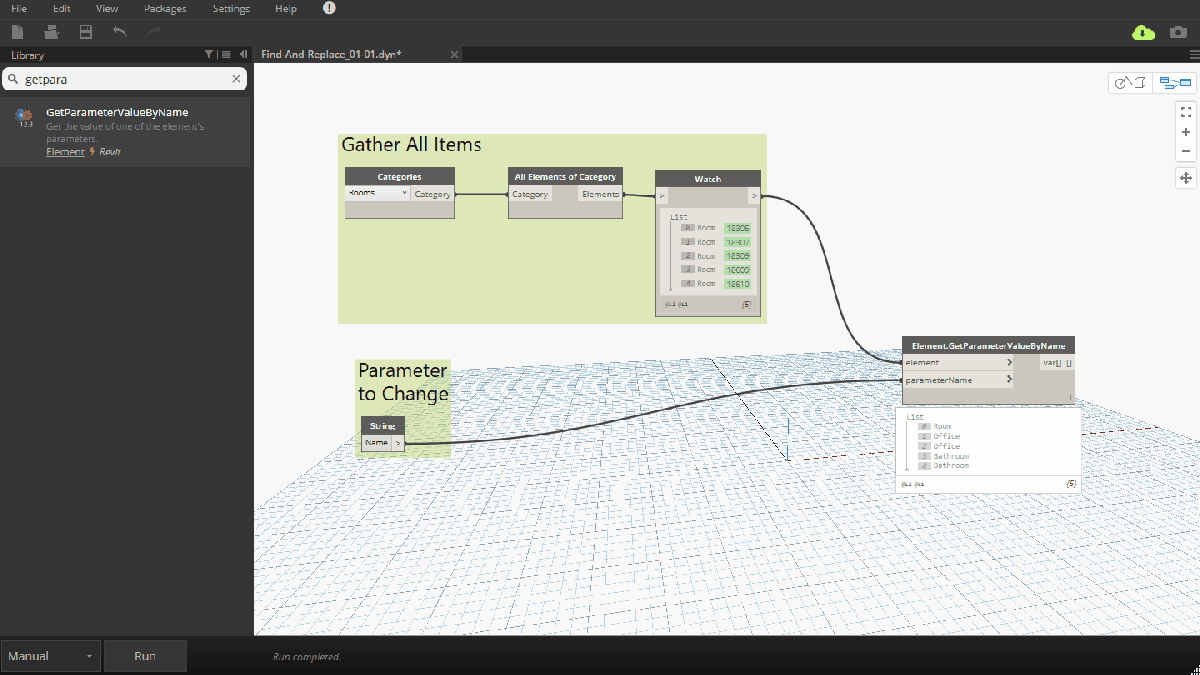
Gather Elements & Find the Parameter to Change
- Utilize the Categories and All Elements of Category nodes to search for the (Rooms) category and then gather all of those elements. When watching, we can see this returns the rooms with their associated model ID.
- After we have these rooms, we want to see the parameter we want to change. In this case, we will use the Element.GetParameterValueByName node. Inputting a String node we can tie these in, and tell it to look at the “Name” value for each of the model rooms.
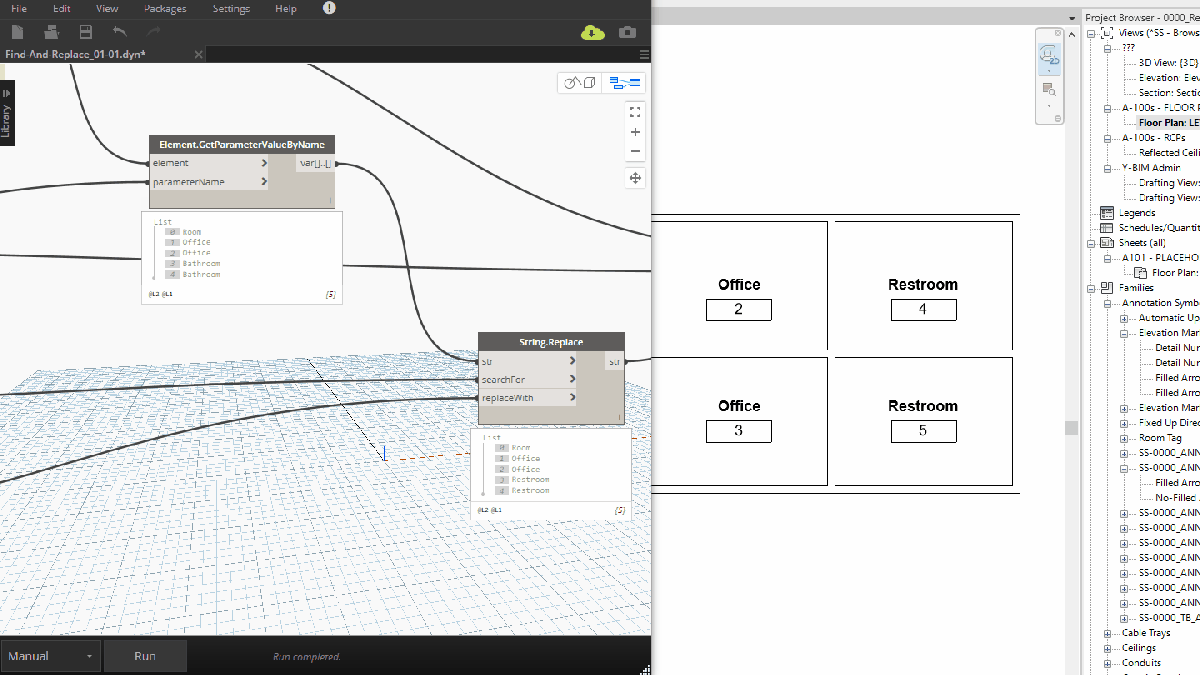
- You can see on like #2, the Room ID is 18309, and the Name for that Room is set to “Office”.
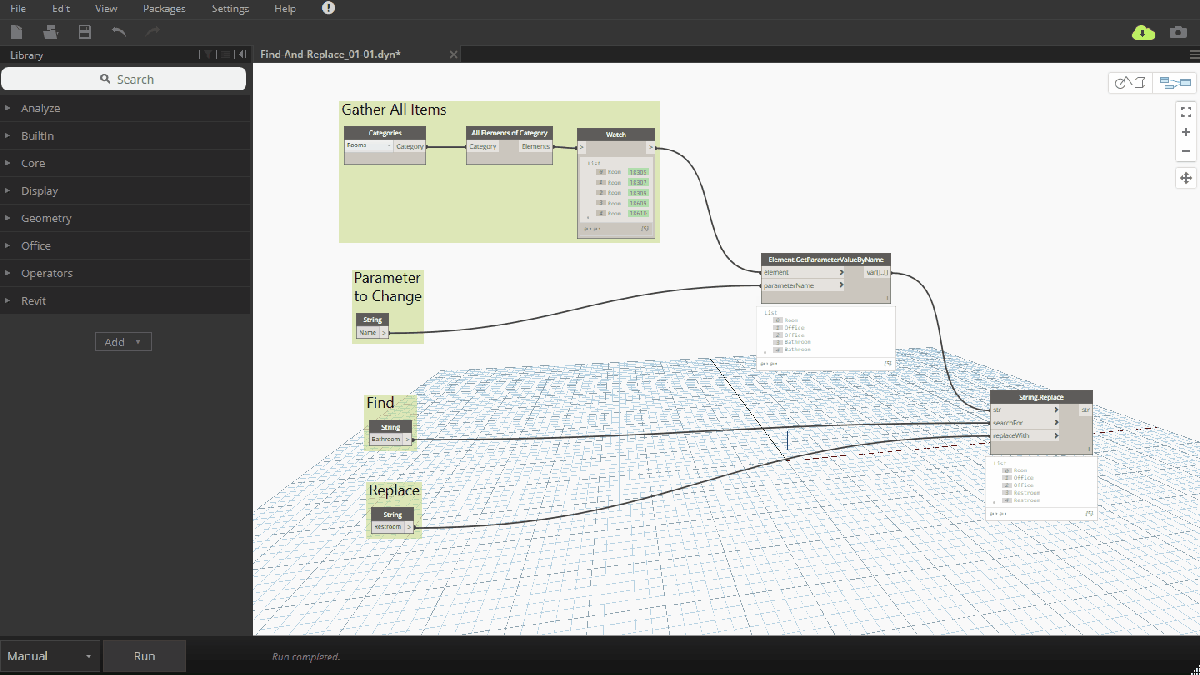
Find & Replace Function
- Adding in the String.Replace allows us to do the exact same thing as a ‘find’ and ‘replace’.
- Using the String node again, we can then have inputs to set these values. Running it, let’s try to change the “Bathrooms” to “Restrooms”. We are not sending this information back to Revit yet.
Setup for Information Back Into Revit
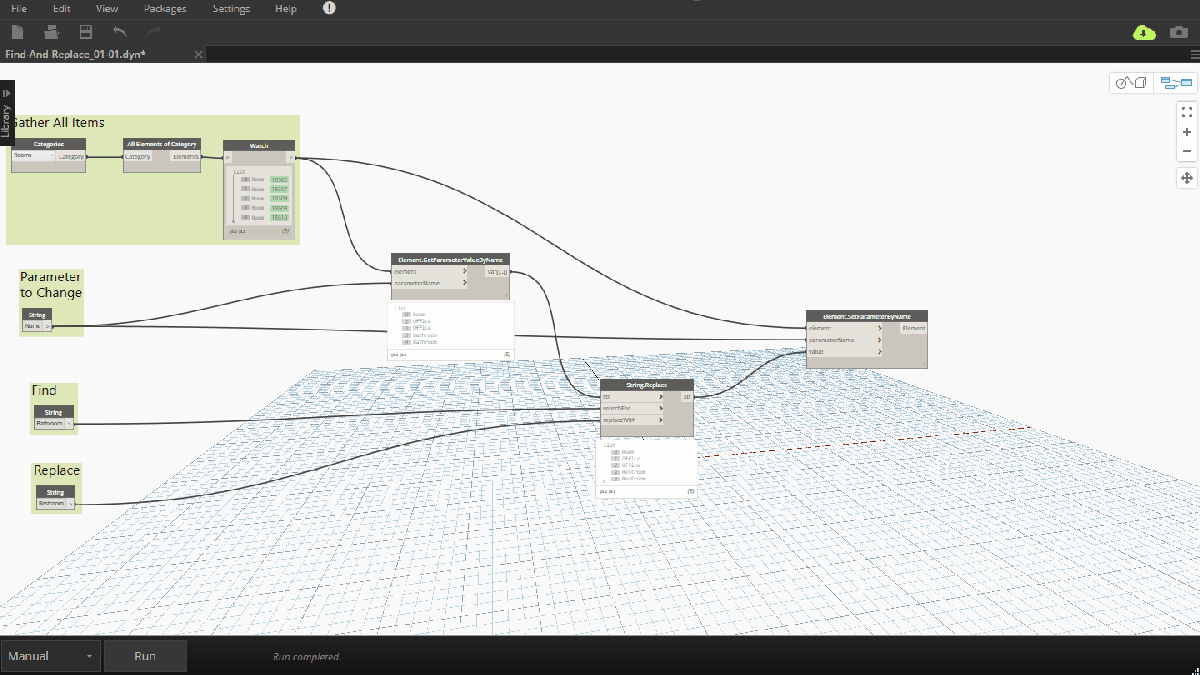
- With everything working, we want to now push this information back into Revit. Using the Element.SetParameterByName node, we can accomplish this.
- Plug in your list of rooms from when you first gathered them using the All Elements of Category. Once you convert the list to a string, that is how the list is stored and Dynamo is unable to recognize the elements, and instead just thinks of it as ‘text’.
- We need to also set what parameter to change, which we can tie the previous string node in step 1 into this spot.
- Clicking run would input values to Revit. We won’t click this yet.
Push Information Into Revit
- We are now able to click run and it will push the information into revit. However, first we will adjust our screen so we can see Revit in the background (obviously easier with 2 screens).
- Once we click run, we expect to see the room tags update with the new name. (From Bathroom to Restroom)
Freeze/Unfreeze
- Since this node we just added will always push the information into Revit, we need to be aware of that. If we first want to test something out to see how it will affect the model, we should freeze that node.
- After testing it out, we can unfreeze the node and then run like normal to push the information in.
Label and Cleanup
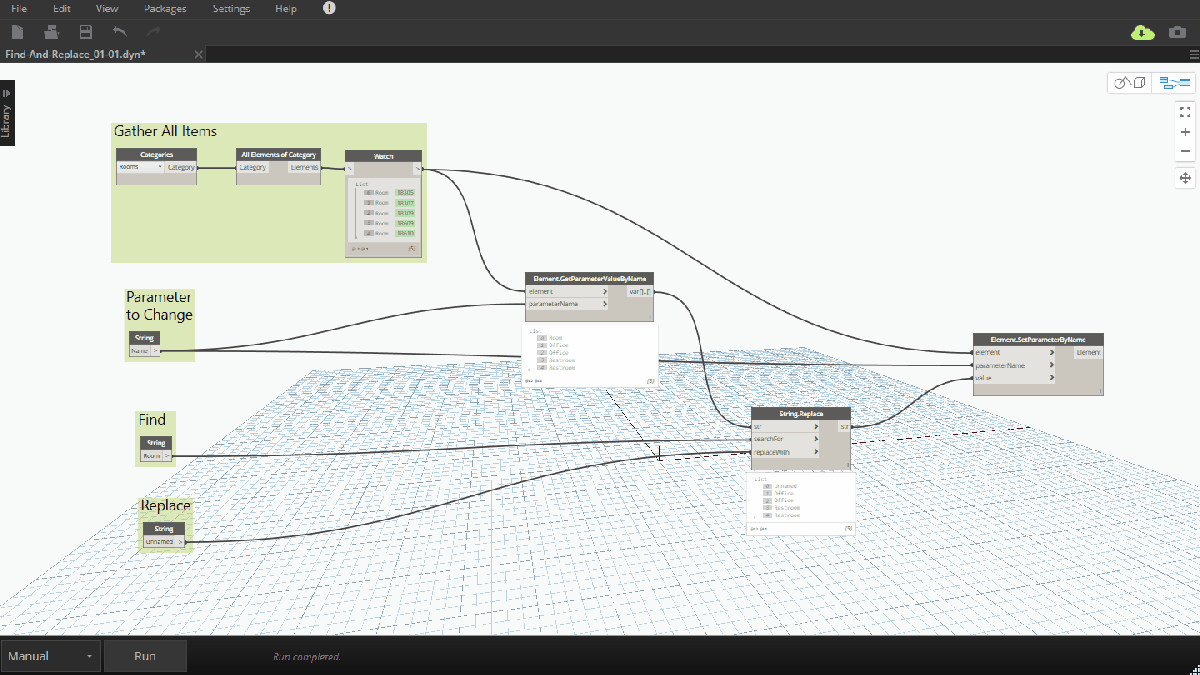
- Simple definition and we already labeled some groups, but add any other labels we need for other users.
- At this time, we would also want to label the actual nodes, that way if someone were to use it through the Dynamo Player, they would show those labels. Doubleclick to edit.
Changing Sheets & Views & Other
While this tutorial is set up for Rooms, you are able to use this definition to change other items within Revit such as Sheets & Views (both cannot be accessed by the Find & Replace). You can also change other parameters besides name, such as the Room Department.
It may make sense to save out separate definitions setup for each of these, to save time in the future or make it easier for other team members.
Example
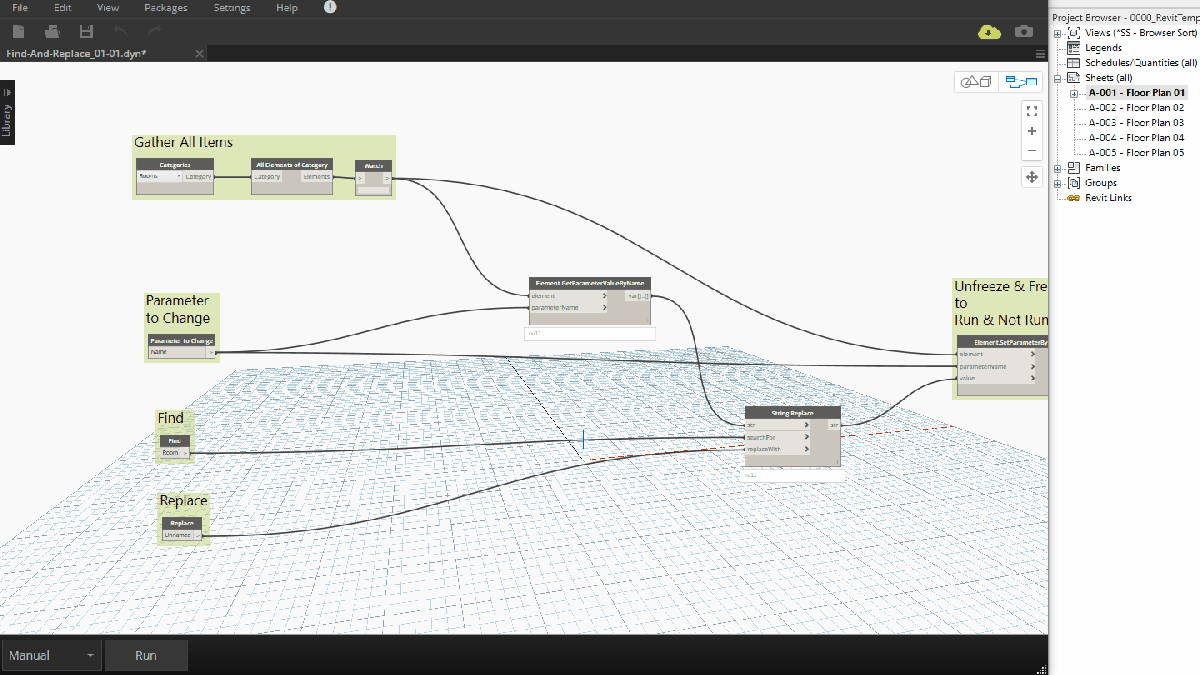
Here we will change all Sheets from being “Floor Plan” to “FLOOR PLAN”. Note that Revit can be seen on the right side behind Dynamo in the example.
- Change category to look at Sheets
- Change parameter name to Sheet Name
- Update your Find & Replace values
- Freeze the last node to test out first
- Once satisfied with results, unfreeze and run.
Notes:
- A space is counted as a character. Therefore there is a difference between “A B” and “AB” within the find and replace.
- The script is case sensitive. “Floor Plan” is distinguishable from “FLOOR PLAN” (as seen in the above example)
- You need to be extra-specific. Just as a normal find and replace, if you were trying to change all “Level 1A” to “Level 1B”… you could not simply do “A” to “B”. This would change all A values to B values. This could result in “Elevation” becoming “Elevbtion”
- Instead, be more specific and include the entire word, or at the very least “1A” to “1B”
- This simplified definition does not have the ability to handle <empty> values (and push a value to them). We’ll post an updated definition to handle that separately to keep this one simple.