Disclaimer: This post references Pattycake. Pattycake is a browser-based .PAT file editing software and creation tool for architects and designers. The owners of ArchOverFlow have a vested interest in Pattycake.
Introduction
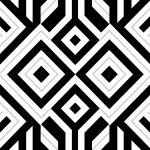
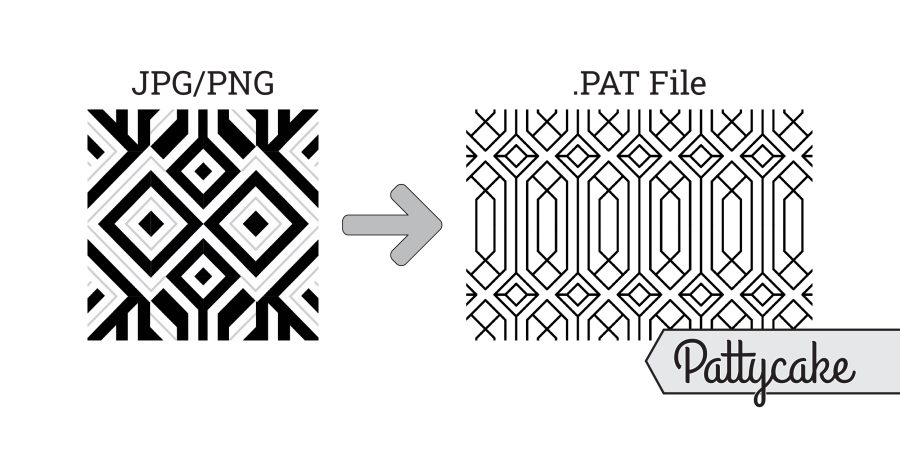
You are designing a space, you find the perfect pattern image on pinterest, maybe google… and you need to incorporate it into your documentation — how does it happen?
Procedure
There are actually a couple different ways you could make this happen. In this workflow, we will utilize Pattycake and Revit. In this particular post, we will use Pattycake’s Drawing Canvas feature to complete the task. For more precision, you may want to investigate using the Pattycake DXF to PAT generator.
Pattycake Drawing Canvas
The drawing canvas is great for quick representations of files, along with drawing more complex orthogonal files. For this, we will use it to generally represent the pattern with single lines for the ‘bars’.
Step 1 – Design
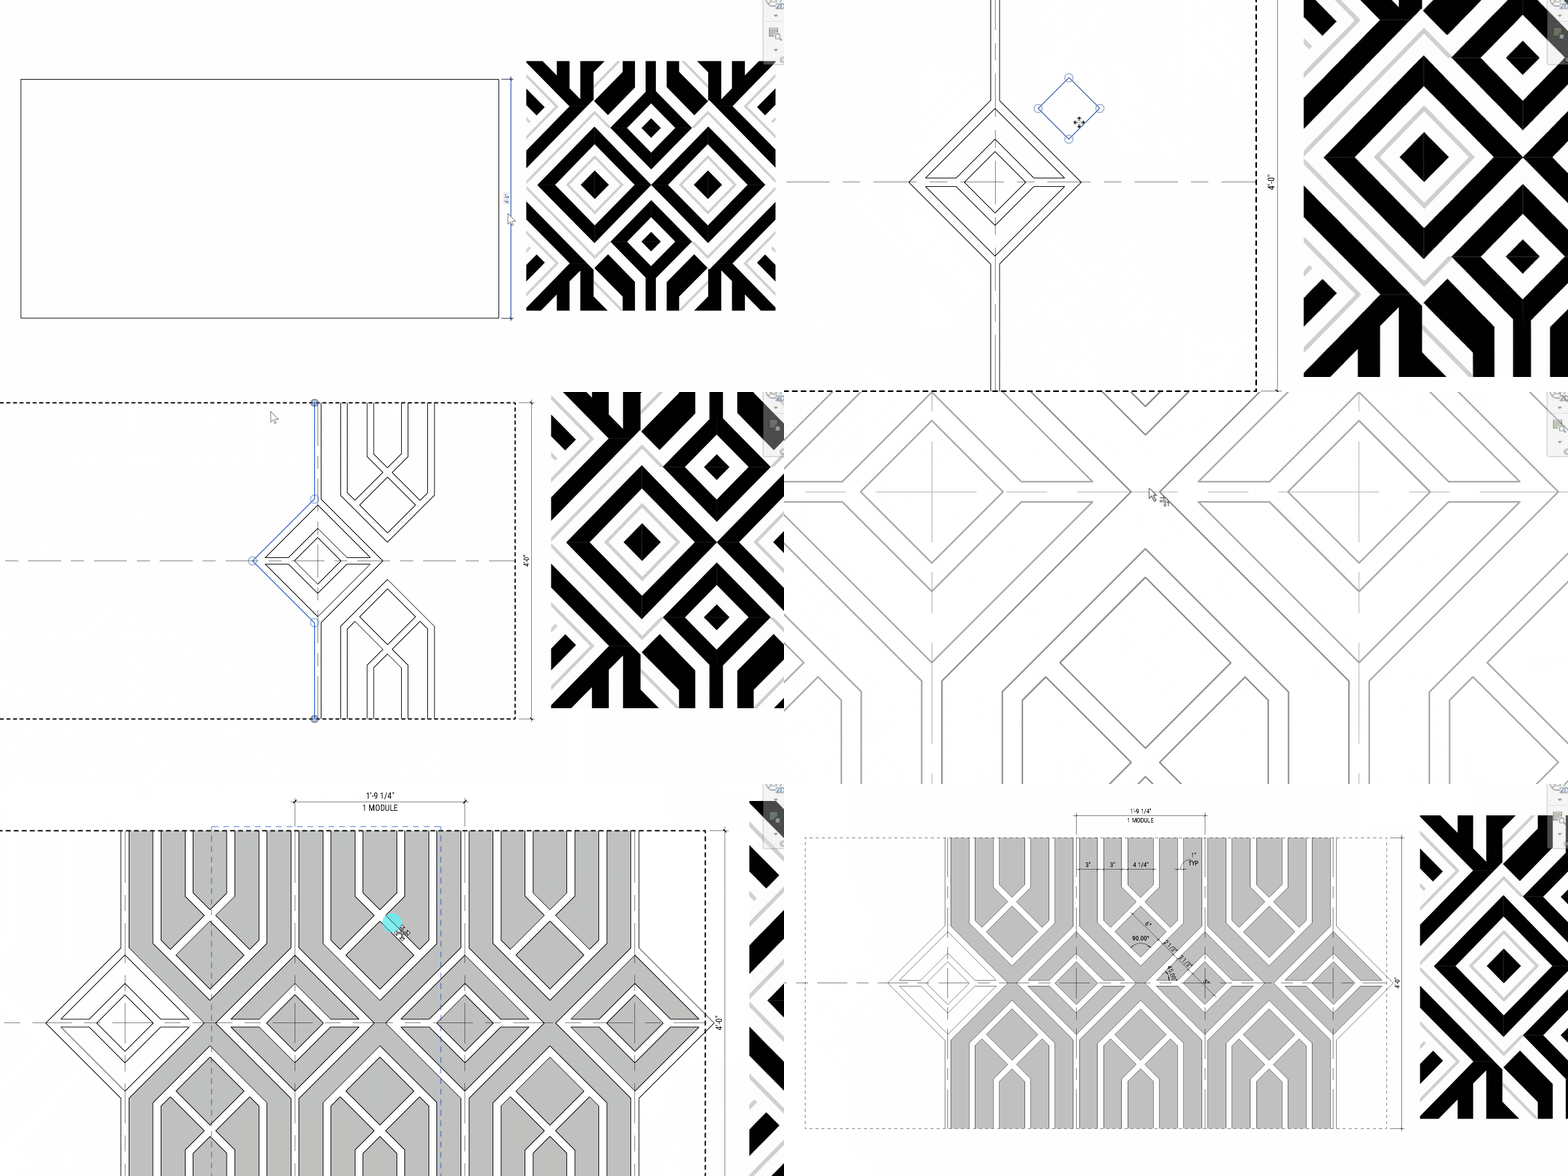
Design however you do you. For this project, we are going to pretend we are making a custom residential railing.
Here, we are using AI as a first image generator for inspiration (why not), and then refining the pattern using detail lines in a drafting view in Revit (embedding the image in Revit to reference). You can of course use any method that works for you, whether CAD, sketching, etc. Different strokes for different folks.
We are using this method because it allows the documentation on the backend to be leveraged (and this isn’t a real design problem). This will be the enlarged detail so we set the scale to 1-½” = 1’-0” and work with it there. I am also using this design process to refine the space and dimensions of the railing.
Step 2 – Module Size
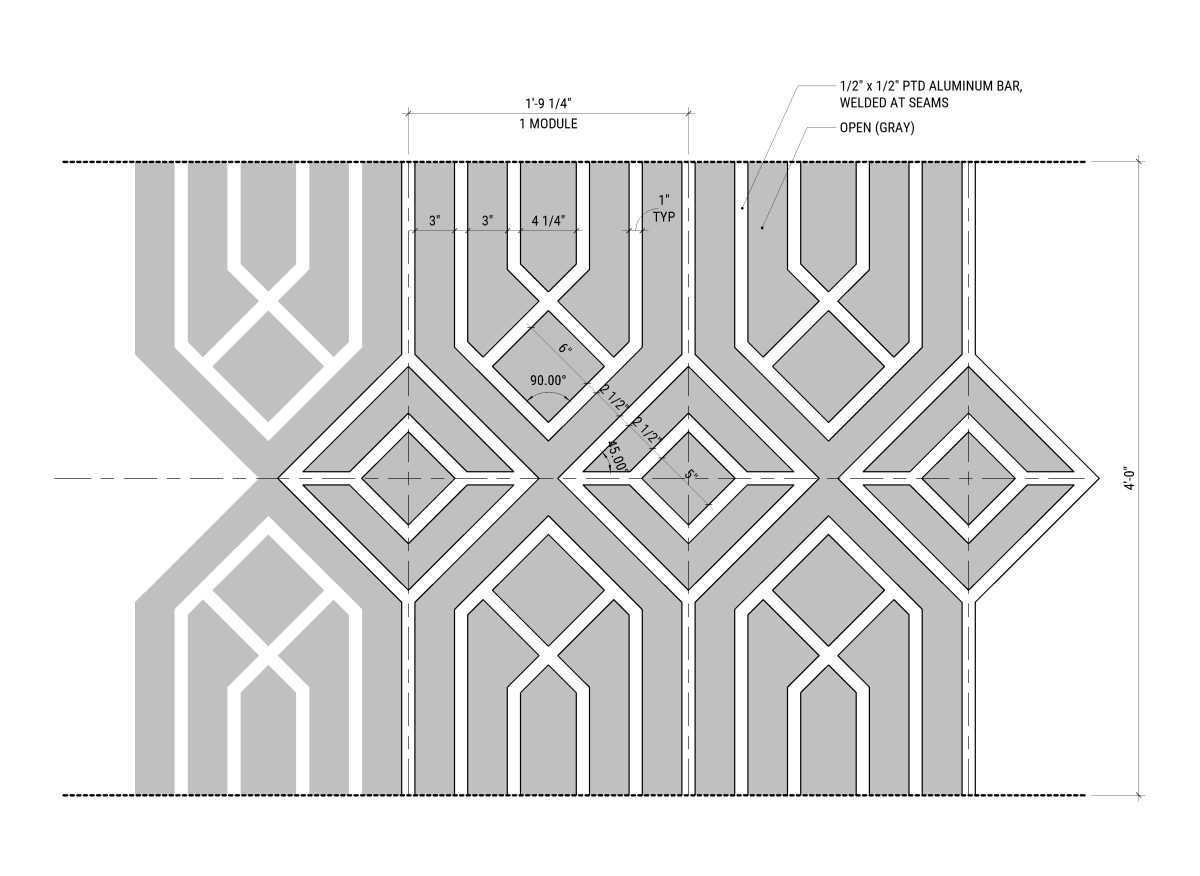
Now that we have the design, you must first identify its repeating module size. For this pattern, the module size is 4’-0” tall by 1’-9 ¼” wide (48” x 21.25”).
Simplify – Least Common Multiple (LCM)
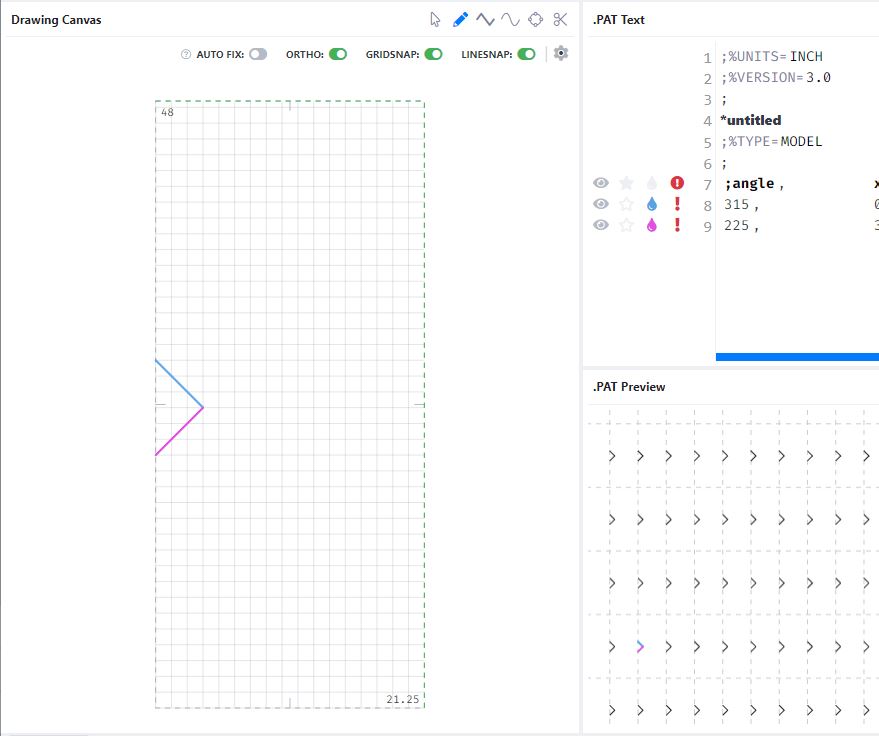
The PAT files repeating algorithm may have issues with decimal canvas size. This is due to the PAT rules which limit how many iterations the algorithm can go through before ‘breaking’. While Pattycake can make the PAT file, it will not import correctly to your Revit/CAD programs and gives you a red notice button. In this image, you can see there immediately are issues (above).
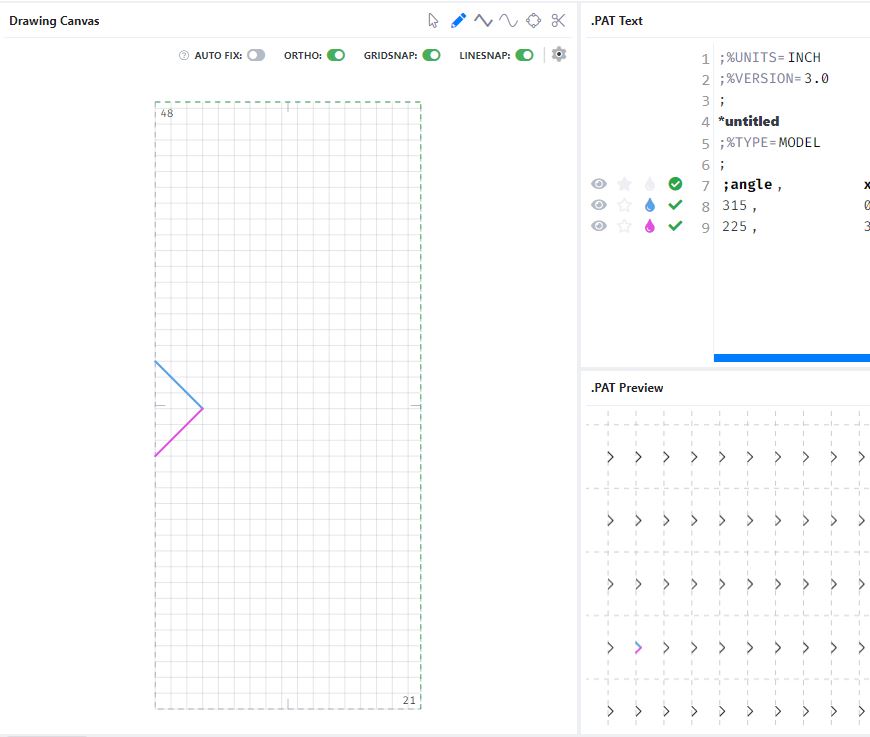
A strategy here is to try and keep your Least Common Multiple (LCM) as low as possible for the width vs height on the canvas size. For example, the LCM of 1’-0” x 1’-0” is 1 — the lowest you can get. The least common multiple of 48 and 21.25 is 4,080. Simplifying this canvas size to 48” x 21” (LCM: 336)— without changing anything else, this solved the problem (above)
- If there was still a problem, 48” x 20” could be the next choice as they have an LCM of 240.
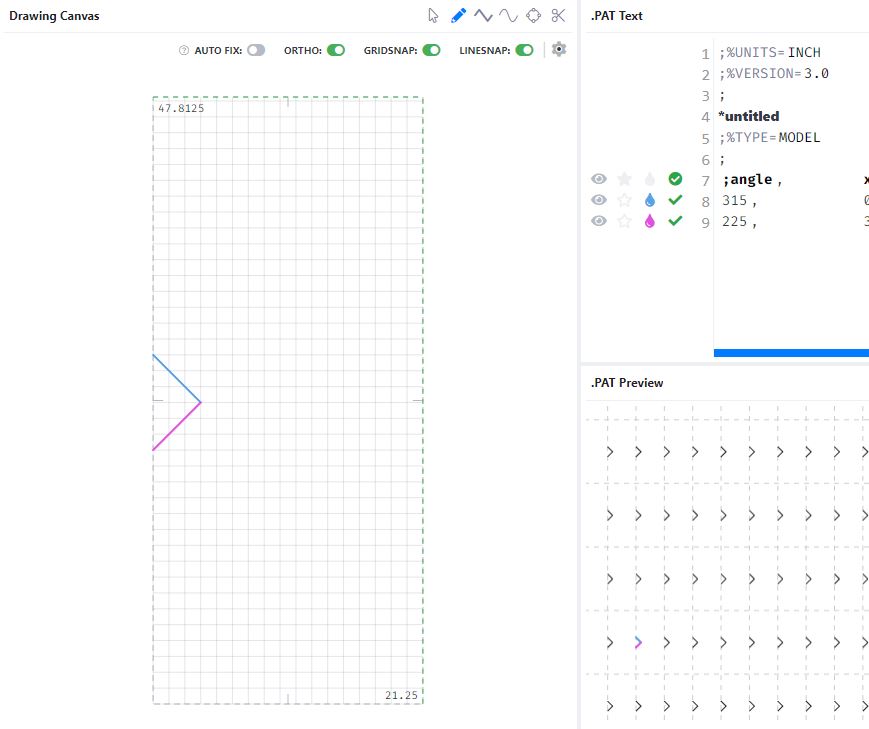
You want to strike a balance of precision needed, with the amount of tolerance you can get away with. For example, if width was of the utmost importance here, you may want to keep 21.25” as your canvas width. In this instance, look for multiple or variations of that value for the height to use. If we use 21.25” x 47.8125”, the LCM is 191.25 (lower than even 48” x 20”!). This value is closer (only .0875” off our actual module) – so we will use this as our module base.
- This value was found by (21.25/4) = 5.3125 + (21.25*2) = 47.8125
Documentation Note
A PAT file works by taking the same lines and repeating them across the screen. Additionally, PAT files are very limited in their precision ability. Therefore, by its very nature and coding, the PAT file ‘will’ repeat at some point in time and typically won’t look great (especially on patterns containing splines/curves). It’s because of this that the PAT file (and graphics/design) is a representation of the pattern. If you are planning on something being designed that would need a custom CNC, or waterjet fabrication — you should include in your specifications or design materials that a full resolution vector, CAD, or another method will be provided. This file will have the precision needed and full intended module (see next).
Size Note
For PAT files, due to its coding limitations, the module size must be ‘reasonable’ — it should not be ‘huge’ or ‘too small’… while these are relative terms, something between 1-5 feet is a good place to aim for.
In our pattern example, let’s pretend that the railing had 5 unique ‘modules’ across each railing (the railing is about 6’-0′ ‘ across). Even if this were the case, for the PAT file, I would still choose one module as a representation, while the enlarged drawing will document the specifics of all 5 unique modules.
Step 3 – Pattycake
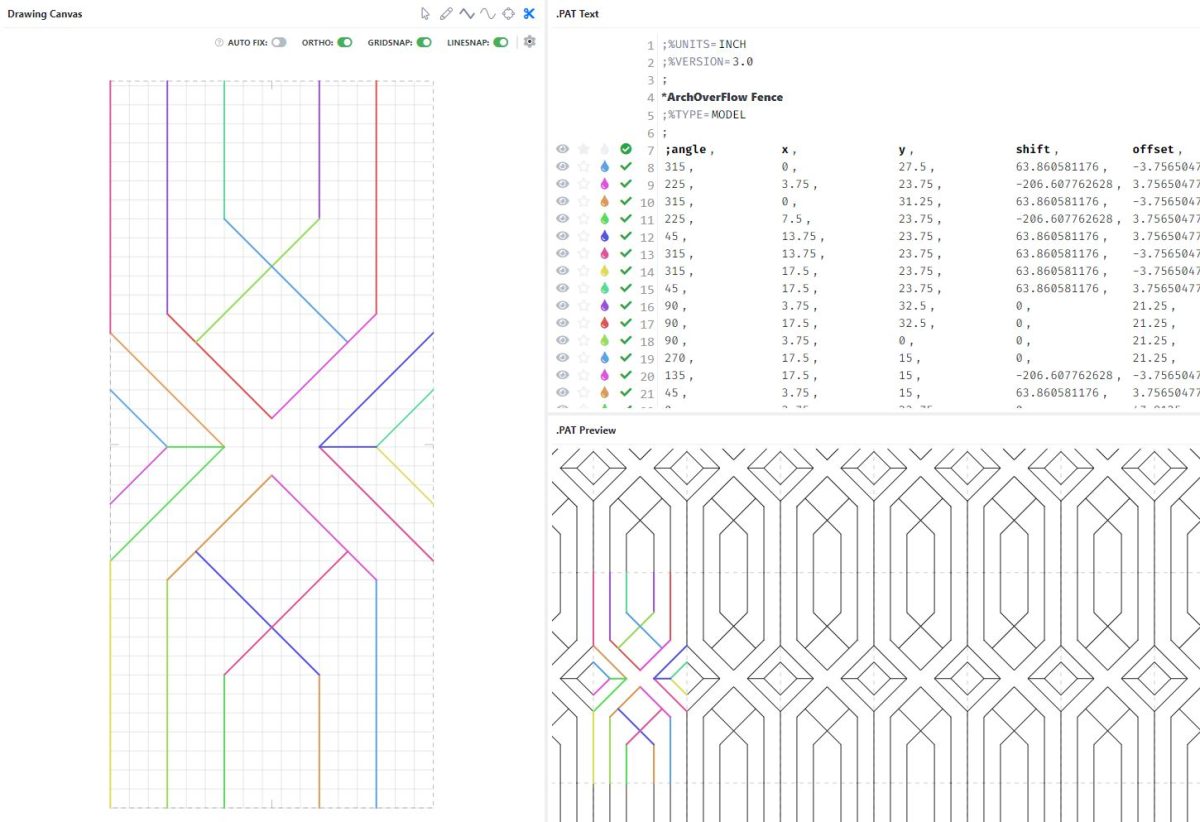
We are going to use the draw-in-web feature of Pattycake to draw this pattern.
- We will start by setting the canvas to our module size (established earlier), and then play around with different grid spacing and use it to establish our diagonal lines. Because this is a representation of our pattern, we do not need to get it, ‘perfect’.
- Make your way through the pattern drawing your lines. The benefit of Pattycake is that it will show you a preview of your full pattern as you go. You will notice that if there are shared lines along edges, you only need to draw them once as the PAT file will repeat them across the field.
Pattycake Tools
Utilize the trim, grid size, and all other tools available to customize this pattern however you need and to get it as close as possible, to your intended result. A benefit of using the Pattycake Drawing Canvas is that you can always come back to this pattern in the future and make slight variations or changes.
Layout Note
You are able to reduce the number of lines in this PAT file if you were to shift the module layout by ½ the height. Essentially have the X-axis bisect the diamond. This allows the vertical lines to be reduced by 5. However, note that the number of lines in a PAT file is not of much concern unless you are in the thousands – for both file performance (PAT/Revit/CAD) and file size. Additionally, this would mean I would need to shift my PAT file for every railing up 24” vertically.
Therefore, leaving it as-is makes the most sense for my use-case.
Step 4 – Name, Categorize, Label, Save
- Give your pattern a name.
- Make sure that the settings are correct (Revit/CAD, Imperial/Metric, etc)
- Add some labels which will help when searching through the patterns in your library.
- Lastly, click save. To make edits, you can ‘fork’ or ‘save as’ the pattern.
<Here is the Pattycake File link, you can download the PAT with a free Pattycake account>

Step 5 – Download and test it out
Pattycake overlays the PAT Pattern rules. Therefore in the .PAT Text window you should be able to see if your pattern hits any errors. If you have a green circle check, you should generally be good!
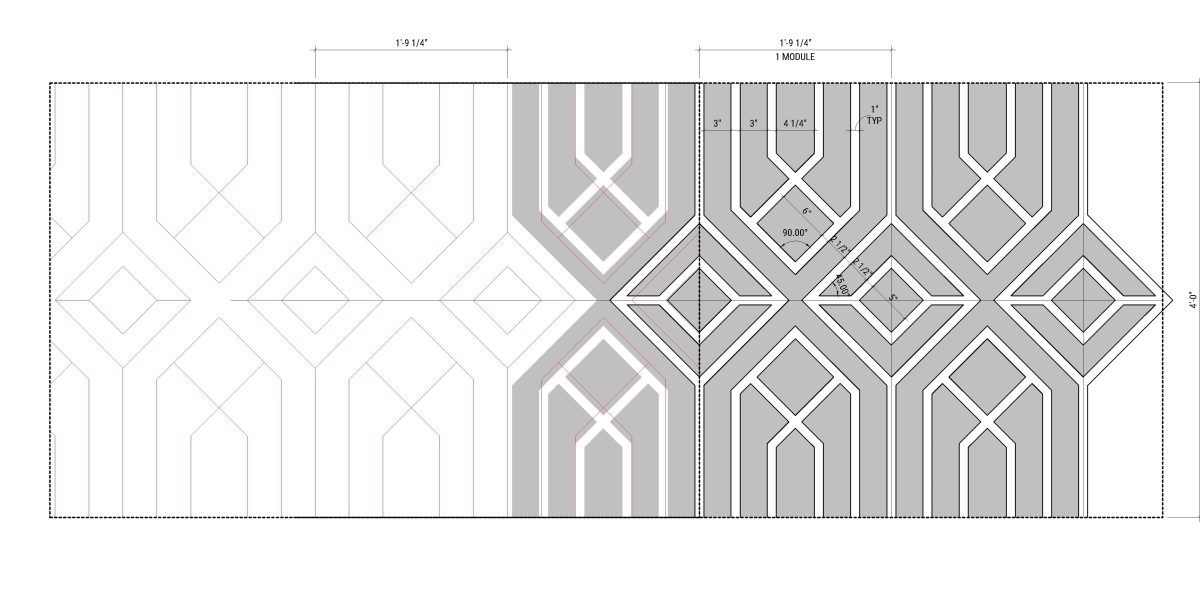
To get more precision, you can use the DXF to PAT file generator. We may cover that in another post (let us know if we should).


Leave a Reply
You must be logged in to post a comment.